I have fond memories from when as a 12-year-old boy I spent a summer with my younger brothers on my Finnish grand parents’ blueberry farm in Ashburnham MA, a sleepy and classically New England town in the north-central part of the state. They had 40 acres up a little hill, and we made money picking “da luberry’ as my grandma Ida would say, which we’d sell to the co-op truck that came by every other day. But it was work, pure and simple.
However, on about one half an acre they had veggie garden, which my grandma would attend nightly as part of her idea of relaxing. And sometimes she would let me help, wherein I found the joy of fresh carrots, tomatoes, green beans, squashes, potatoes, and even turnips, which I’d never seen much less eaten. We’d get on our hands and knees weeding, and she’d sometimes tell me stories. And oh would she laugh, in one of the most contagious high-pitched squeaky laughs I’ve ever heard! Makes me smile, still hearing it in my mind 45 years later.
Truth is, I’d all but forgotten those days, what with raising a family with 3 sons, some health stuff, a sweet sailboat, and running a business. But today, as I have time and opportunity to take a master grower's class, and rub elbows with the gardening experts at New England Hydroponics, it strikes me there’s never been a better time to start an outdoor veggie garden. Seems as good a strategy as any as we try to get through this craziness.
So that’s the plan. Not just to write about it, but to do it! Who knows – I may even get my twin sons, both graduating from UMass Amherst this spring, to come and help me. And you know, I bet we laugh some too!
Step 1. Planning
Having been an indoor medical grower for the last 5 years, an outcome of a major surgery, I’ve come to understand it’s not about how much you grow, but how much you can grow and control so you get quality harvests. So my sense here is to start small and, if the creek don’t rise, to add to it in years to come.
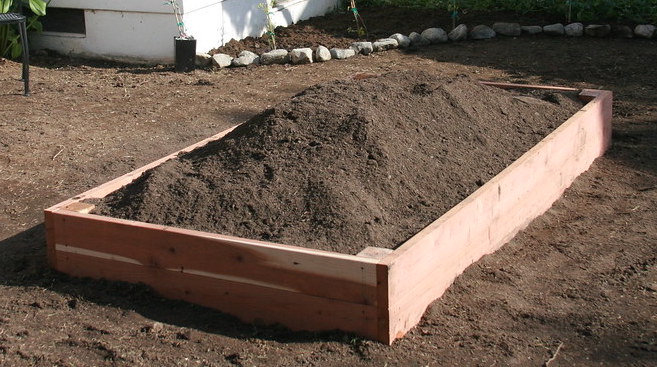
In-Ground or Raised Bed? There’s something to be said about both raised bed and regular in-ground planting. In the raised bed form, you create some sort of boundary, either store-bought or make with 2x6’s as a DIY project.
By virtue of raising the bed, your plants’ root zone gets warmer faster (ideal root zone temperature is 68-75 degrees F) – and stays warmer too, so you have got to make sure you water regularly. You can also stack the deck, nutrient-wise, by buying a supplement made for it, such as Coast of Maine Raised Bed Castine Mix, Wiggle Worm Soil Builder Worm Castings, SoHum Living Soil (very potent - must be mixed) or Bu's Blend Bio Compost.
Conversely, planting directly into the ground gives you more flexibility. But you’ve got to know what you’re working with for soil. The main question is whether it’s nutrient rich enough for organic gardening, a process where few nutrients are used. An importantly, what’s the pH (more on this below)?
Both methods require you condition the soil – ideally roto-tilling and working in yard compost and even composted manure to fully loosen and aerate your soil down to 12” as possible. There are also things you can add to improve soil quality and improve pH – I’ll mention them as we get to them.
For my purposes, and knowing I have a layer of clay and granite a couple feet deep, I’m going to create a raised bed garden, first going to my wood pile see what I have for a border; pressure-treated wood is ideal – though any lumber that meets the function and aesthetic will do.
2. What To Grow
One outcome of getting your children involved with growing a garden is once they’ve grown veggies, their pride of ownership will lead them to trying some. They may not love them (the virtue of turnips still escapes me), but at least they’d get over the fear of them some kids have.
I know I was very surprised when one of my now adult twin sons, who used to avoid vegetables that weren't french fries, recently cooked up a veggie entrée for us during this stay-at-home period. You just never know what they will retain of their youth!
Now to keep their interest all growing season, it’s important they start to see results quickly, and ideally can also harvest throughout the season. Here’s a list of garden plants – vegetables and flowers – to consider.
• Carrots – try smaller varieties, but watch out for bunnies!
• Radishes – grow rapidly, fun to watch & pick (even if you don’t eat many)
• Snap & Snow Peas – delicious right off the vine
• String Beans – big harvests, fun to pick
• Potatoes – you can even make you own seeds using the ‘eye’ of a potato
• Cucumbers – fun to hunt and find on the vine
• Zucchini Squash – prolific with many uses from side dishes to baked goods
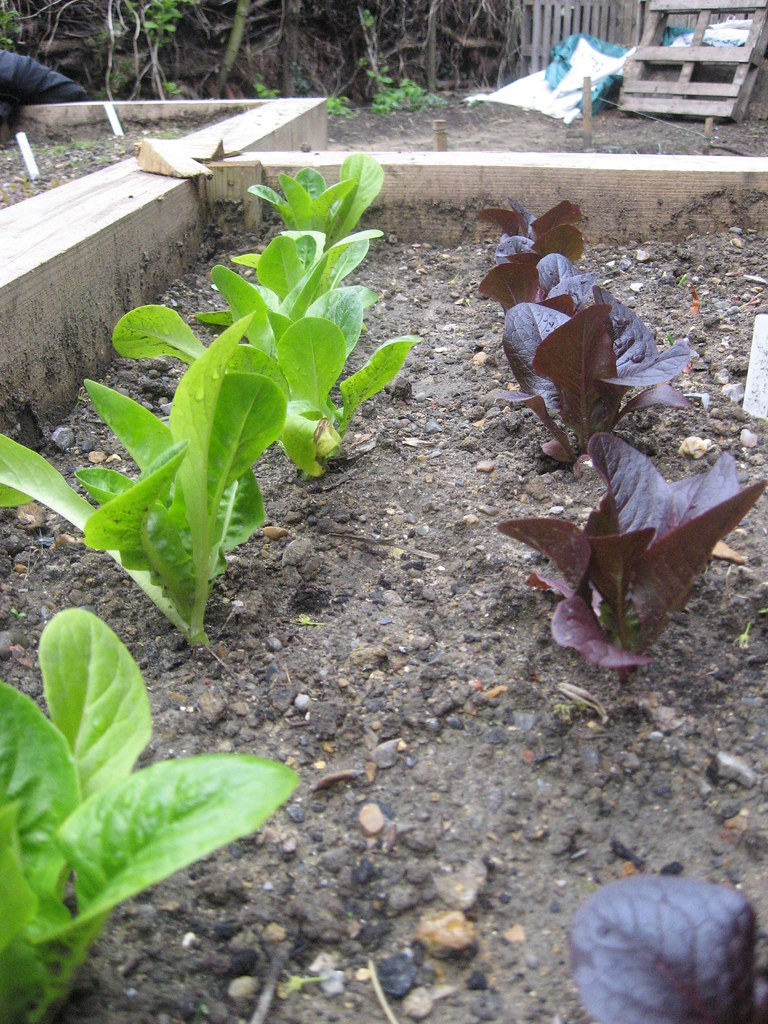
• Lettuce/Salad Mix – stagger planting to produce a harvest all season
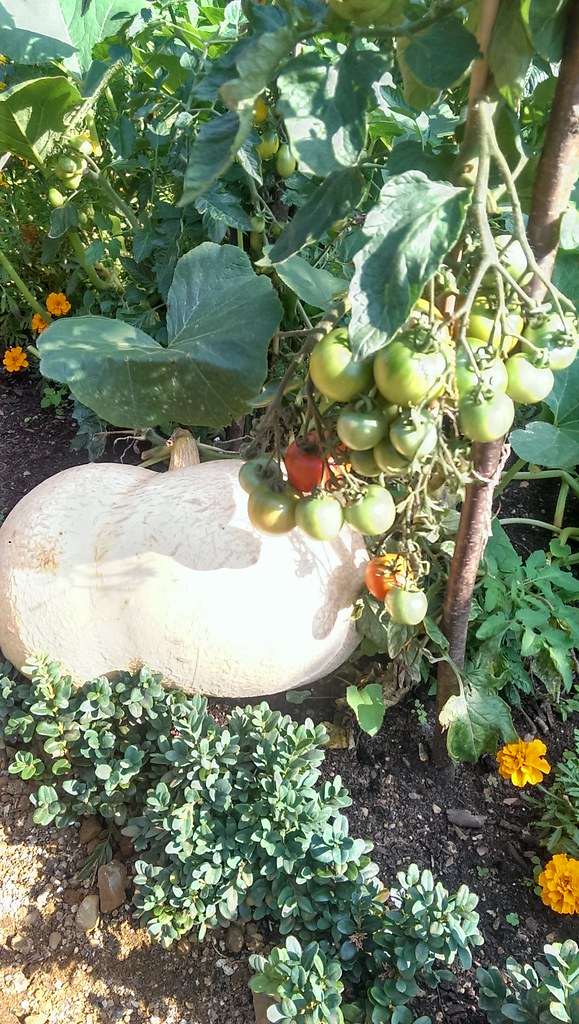
• Tomatoes – ever pop a cherry tomato fresh off the vine? Sweet joy!
• Sunflowers – tall beautiful flowers – ideal to line a far side of a garden - use your harvest for birds in winter!
• Marigolds – adds brilliant colors to the garden
• Snap Dragons – interesting shapes, very colorful
• Pumpkins – have to be fed and cared for, but … Halloween!
We now carry an amazing line of organic High Mowing veggie & flower seeds that support the family farms that grow these professional-grade organic seeds, all of whom have a mission to provide a safer ecosystem for pollinators using agricultural practices that result in healthier soil, water, and communities.
3. Prepare Your Soil
The plot I’m using on my land has lots of composted plants, to which I’m going to add my lawn/leaf compost mix and work into the soil as evenly as I can with shovel, rake, and a roto-tiller attachment I just got for my brush cutter. I’ll probably also add a bag or two of organic soil to bring up the nutrition value.
Then, it’s about testing the soil pH, its acidity or alkalinity, which frankly, most new gardeners won’t consider. But it’s worth knowing about – and if possible, acting upon what you know.
It's just this simple: plants get most benefits from nutrients in the soil when the soil and water content pH is between 5.8-6.5. This is the range microbes need to break down nutrients for uptake by your plants. Above or below this range can stunt growth by locking out essential elements such as iron (can be locked out above 6.5).
Testing is easy. You can buy a soil tester you simply put into the soil, and get a pH reading. You can also make a ‘slurry’ – mix water well with your soil and use a pH meter to test the run-off water to determine its pH level.
Soil pH Remedies
For soil that’s too alkaline (pH over 6.5) mix in:
• Fish
• Organic Mulch
• Peat Moss
• Sulphur
Too acidic (pH under 5.8):
• Gypsum
• Limestone
• Oyster Shells
• Quoddy Compost
Do it right, and your plants won’t need more than water, and perhaps some humic acid and kelp, mixed in a 5-2 concentration for leafy growth. But please watch what else you add. One of the big-name commercial plant feeds may grow bigger plants and is good for flowers and ornamental gourds, but it remains within the fruit or vegetable after harvest - you can do without it. And gardening organically is just so much healthier overall.
Starting Plant Starts Indoors for Transplanting To Your Outdoor Garden
If you live in New England it's still too cold to plant seeds other than the very hearty varieties such as snow peas and carrots. The best way to get the most out of your garden, and if indeed you're looking for another little sub-project to keep your kid's involved, is to consider starting some of your plants inside.
The process is pretty straight forward. Read planting instructions on your seed packets; on mine I see instruction about soaking some in water overnight and even nicking the seed for faster results.
I'm keeping it simple and buying a couple Root Riot seed starter trays that come with pre-moistened plant starter plugs (50-count). We also have a nice option for a complete "mini green house" starter kit, that comes with a light, tray, starter plugs, and a dome, which can also be used to grow herbs indoors year round!
The key to starting plants from seeds is gentle warmth. This can be accomplished using a mat warmer; and also if you have good sun exposure for at least 4-8 hours per day.
A grow light is recommended; a small LED or flourescent grow light fixture is a good idea. Lights will really give your seedlings a jump ... but as long as you have good outdoor sunlight coming in through a window, you should be OK for seedlings alone.
Get To It!
Well, that should give both of us enough to do for now. Just remember to watch your local weather for planting advice related to outside temperatures – don’t want to expose plants to frost, which can happen in New England though May!
One last word: fence. There’s a reason bunnies are associated with carrots!
Look for my next installment coming soon. Until then, I hope you make some great family memories gardening even through these crazy times! Happy gardening and stay safe! - Tom Lanen
Dad to 3 twenty-something sons, Tom is "marketing & creative guy" for New England Hydroponics' 4 MA retail locations and online store; and principal of Thomas Marketing Services. Having sold his sailboat last September, he's thoroughly enjoying being able to escape his now-crowded home office to his gardens. These days you can also often find him on Chat at nehydro.com